This post is a sort of tutorial on how to save your Power Point slides as high resolution images. It is not uncommon that a scientific journal requests images having 150 DPI or above. Usually, academics use power point to make the figures they use in scientific articles. Unfortunately, Power Point do not save slides as images at a high resolution (150 DPI). Personally, I use both Microsoft Power Point and Adobe Illustrator. I have no preference for one or the other, it depends on the kind of figure.
On this point, the good of Adobe illustrator is that it allows users to set up art-boards at 300 DPI or higher. Thus is really simple exporting high resolution images. On the contrary, exporting slides from Power Point with built in exporting process such as “export” or “save as” do not ensure having a high resolution image. Let’s pick an example.
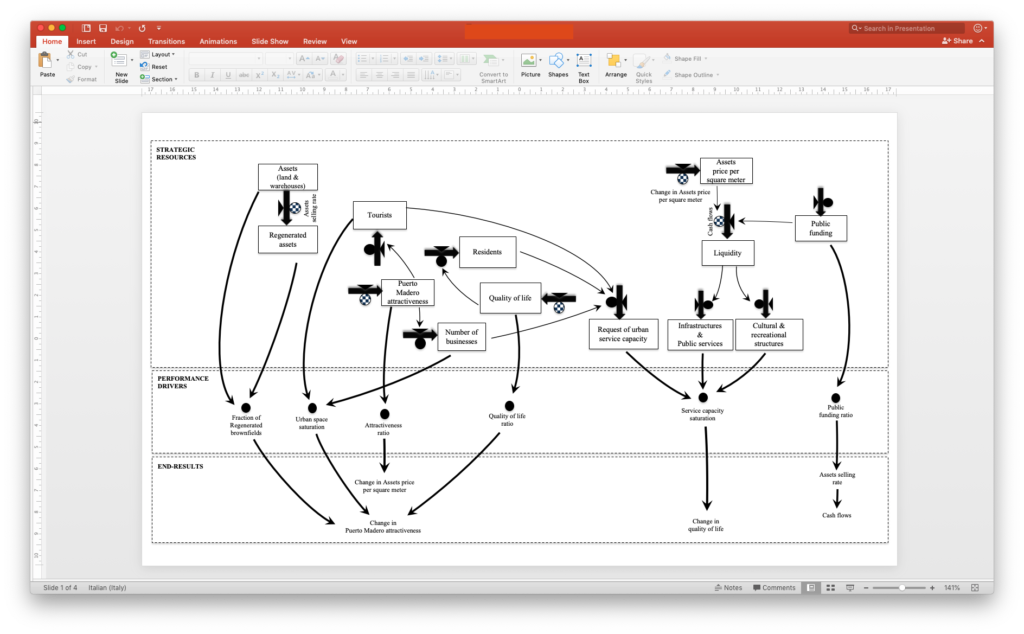
The image below shows a Power Point version of an image I included in an article published in the International Journal of Public Administration. I have co-authored such a paper, and I remember that during the production process the Journal asked me a 300 DPI image of that chart. At the time of the submission, I uploaded a PNG file – exported from Power Point – with 72 DPI of resolution.
Bianchi, C., Bereciartua, P., Vignieri, V., & Cohen, A. 2019. Enhancing Urban Brownfield Regeneration to Pursue Sustainable Community Outcomes through Dynamic Performance Governance. International Journal of Public Administration, 00(00): 1–15.

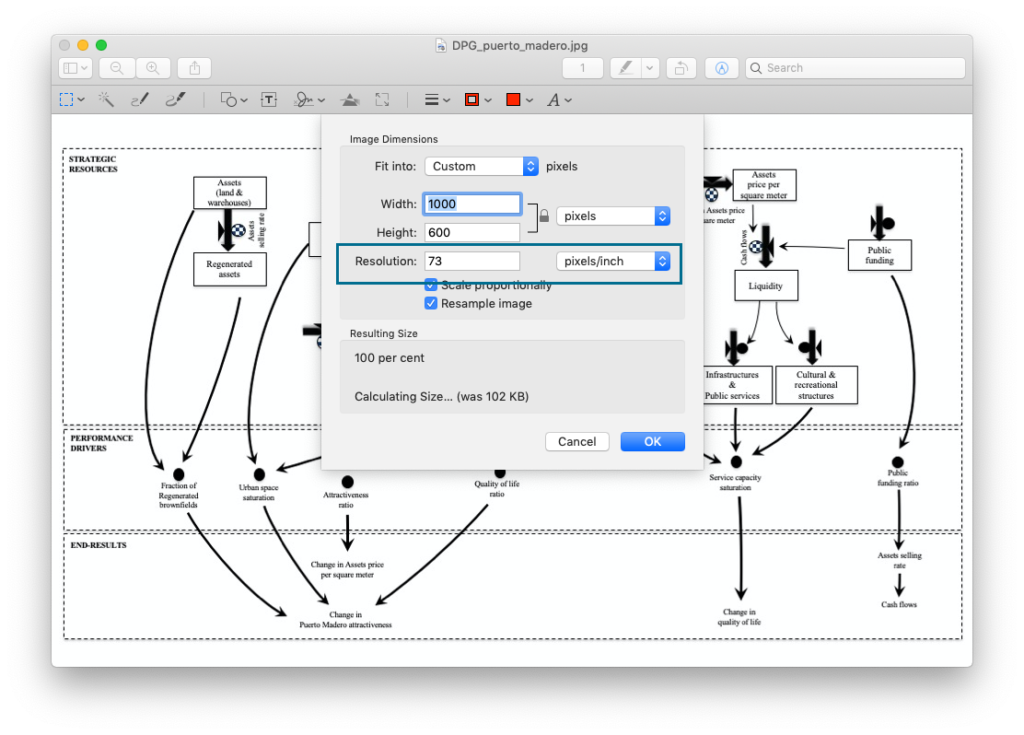
As I said before, the International Journal of Public Administration requested a high resolution images (300 DPI or more). As the image below shows power point built in export feature creates JPEG or PNG files at 73 DPI ( I don’t know why this time at 73 and not 72 DPI :-/).

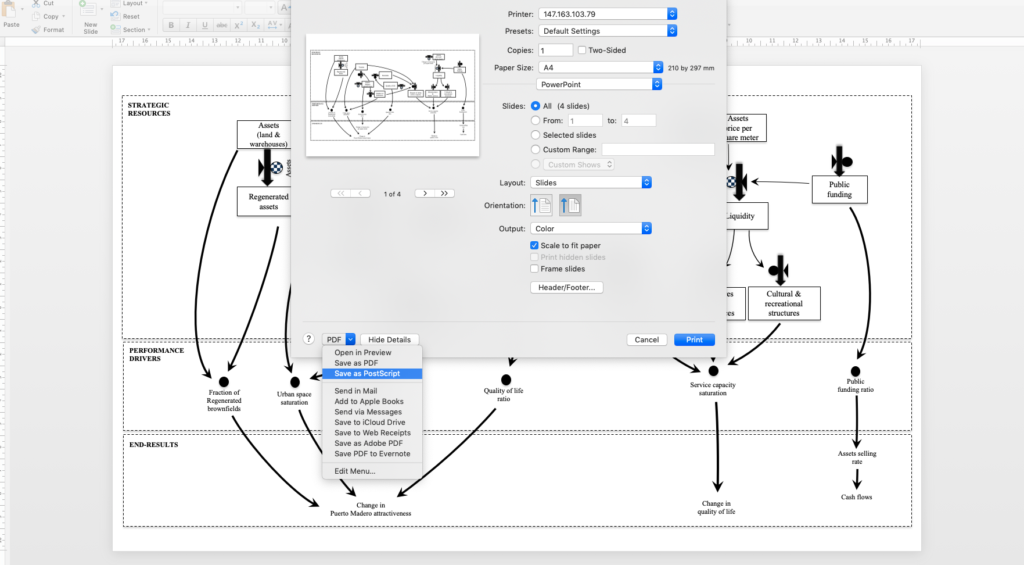
This resolution is not enough. So, I tried print features. Particularly, I selected PostScript.
Postscript is a programming language that describes the appearance of a printed page. It was developed by Adobe in 1985 and has become an industry standard for printing and imaging. Postscript describes the text and graphic elements on a page to a black-and-white or color printer or other output device, such as a slide recorder, imagesetter, or screen display.
Following few simple steps, it is very simple to print Post Scrip files in Power Point.
Menu Bar-> file -> print-> PDF drop down list->Save as Post Script

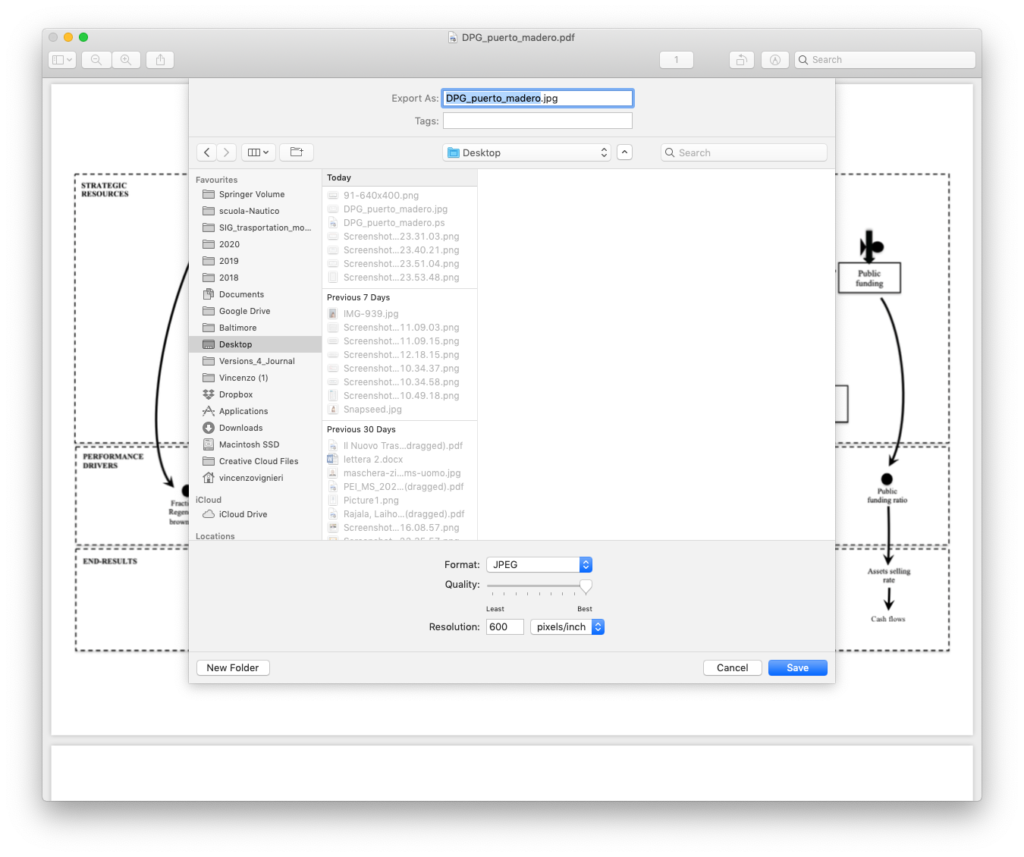
Having saved the file as Post Script, it is possible to open the .ps file with Preview on Mac or Adobe Pdf Reader. In this case, the software makes a conversion of the file from .ps to PDF, then it opens the file. The figure below show 4 pages since the entire Power Point file used in this case has 4 slides, but we use only one page.

Once opened the .ps is converted in a PDF file, which can be exported as image. From Preview it is possible to export from PDF to JPEG. As the figure below shows, selecting “export as” located under the “file” menu it is possible to set-up the resolution. Pixel per inches ranges from 0 to 600, which is far beyond the 300 DPI, requested by the journal, and in absolute term a very high resolution.

By saving the file the process has finished. To summarise, this post has shown how it is possible save Power Point slides as high resolution images, without using Photoshop or Illustrator. Using Adobe software it is possible to import a PDF file saved by Power Point within a 300 DPI art-board. Although this is another working solution, it requires using an expensive software and not all academics are familiar with the Adobe suite for graphic designers. Hence, saving as Post Script enable us to export our Power Point slides as high resolution images in an easy and accessible way, without compromising quality.
1 comment